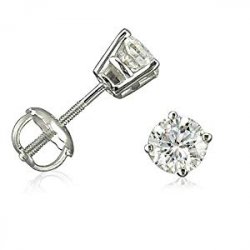
A screw-back Earrings for sale includes a clasp mechanism that permits you to adjust designed to sui
Se næste indlæg >
Instructions Of Bead Weave Earrings
Augus Conrad
Bead weaving Wholesale Earrings runs on the needle and thread along with a stitch method to create an item that looks just like an item of art rather than simple beaded project. The advantage of bead weaving having a needle and thread over a loom is that you can easily manipulate your design and quickly test new methods to see if they improve the artwork. An easy way to showcase your bead weave art would be to make it into an earring.
![]()
Weave the Beads with a Brick Stitch
Select a number of small beads, just a few millimeters long, since this project is supposed for earrings. Since you are using small beads, you will also need an exceptionally thin beading thread. Put a bit of thread at least 18 inches inches long, from the eye of the thin needle. Make use of a needle that is not considerably longer than about 1.5 inches so it’s an easy task to maneuver with the beads.
Thread the needle and line by way of a single bead and move the bead toward the finish, leaving 4 inches of line hanging. Tie a knot on the bead to create an anchor bead. Cross both ends over the bead and loop them together as the bead rests at the bottom from the loop. When you are finished, the knot will probably be up against the side from the bead, between the two bead openings. The needle will be on the long end.
Pick up seven beads with the needle. Loop the needle back around to go back through the last two beads. Both beads about the end can have two strings with the middle. Pull the thread tightly to make the beads stack along with each other. Continue returning through each bead inside the same direction when you experienced it initially. All your beads should touch after you return through each bead, forming a tiny chain.
String two beads about the thread you’re simply using and keep the 4-inch tail hanging. Hold the chain using the end of hanging thread around the left. Put the needle down between the second and third bead from your left by going behind the very best thread and looping up before that same bit of chain thread. This will draw the second of the two beads you just added, down toward the chain. Position the needle up through that second bead. Add another bead and grab the most notable thread with the chain involving the original second and third bead and loop the needle back with the bead you merely added. Continue doing this step when you move toward no more the chain and stop whenever you cannot get any longer thread in the chain. You have the beginning of a triangle. Repeat these steps and don’t forget to pick up two beads prior to starting each row. You may follow the steps til you have two beads towards the top of a triangle.
String no less than six beads, or some other even number, about the thread you merely finished using. This piece will connect with the element that loops from the ear. Once you add the beads, place the thread down with the opposite side with the triangle, dealing with each bead along the way down. Put in a series of beads, as many as you need, and loop the thread back up from the bead line toward the triangle. Decrease with the next bead of the bottom of the triangle and hang another distinct beads. Complete this before you reach the end and tie the past end of the string to a new portion of string. Attach the Wholesale Earrings element of the top loop of beads.


Ingen kommentarer endnu